Running a Rancher Desktop Development Build
You reported a bug against Rancher Desktop, someone fixed it, and the issue got
closed. But the fix is sitting on main, and the next release is still weeks
out. You'd rather know now, while reopening the issue is still easy.
You can, because every merge to main, and every pull request, produces an
installable Rancher Desktop build, whether you're on 1.x or 2.0. Running one is
more involved than installing a release, and a bad build can damage files on
your host.
Sometimes the fix or feature you want hasn't been merged to main1 yet and
lives only in an open pull request2. You can install that build too, and try
the change before it lands.
A development build hasn't been through the testing a release gets, so it can break in ways nothing has caught yet. A bad one can damage files on your host, outside the VM. Back up anything you can't afford to lose before you start.
So this is really for people who are comfortable switching between versions and running factory resets, and who can put things back when a build breaks something. If that's not you, I'd wait for the release; the fix will land there soon enough.
The short version
On Rancher Desktop 1.x
- Take a snapshot first.
- Find the build and download the artifact for your machine.
- Unpack and install it. On macOS, clear the quarantine flag, or it refuses to open.
- Check whether it fixes your problem, or try the feature you wanted.
- Factory-reset from the development build.
- Install the release by hand, then restore the snapshot from step 1.
On Rancher Desktop 2.0
- There's no snapshot to take, so your existing workloads are gone either way.
- Find the build and download the artifact for your machine.
- Unpack and install it. On macOS, clear the quarantine flag, or it refuses to open.
- Clear the existing backend with
rdd svc deletebefore you start. - Check whether it fixes your problem, or try the feature you wanted.
- Clear the backend again with
rdd svc delete, then install the release by hand.
Have a way back before you start
There's no in-place downgrade back to a release. Going back takes a factory reset, and that reset wipes everything the backend is holding: your containers, images, volumes, and Kubernetes cluster.
So on Rancher Desktop 1.x, take a snapshot before you install the development
build. It captures all of that, and you can restore it once you're back on a
release. Rancher Desktop 2.0 has no snapshot mechanism yet. It also refuses to
start on a backend that a different rdd3 version created; switching
versions there means clearing the backend and losing those workloads, in either
direction. And even where you can snapshot, it only covers what's in the VM. A
snapshot is not a backup of your host, and it won't save you from a build that
damages files there.
A development build also turns off auto-updates. It won't quietly replace itself, and it won't pull you back onto a release either. You reinstall the release build by hand when you're done.
Find the build
You need a GitHub account, and you have to be signed in before GitHub will let you download a build.
Everything below happens in one of two repositories, rancher-sandbox/rancher-desktop for 1.x or rancher-sandbox/rancher-desktop-2 for 2.0.
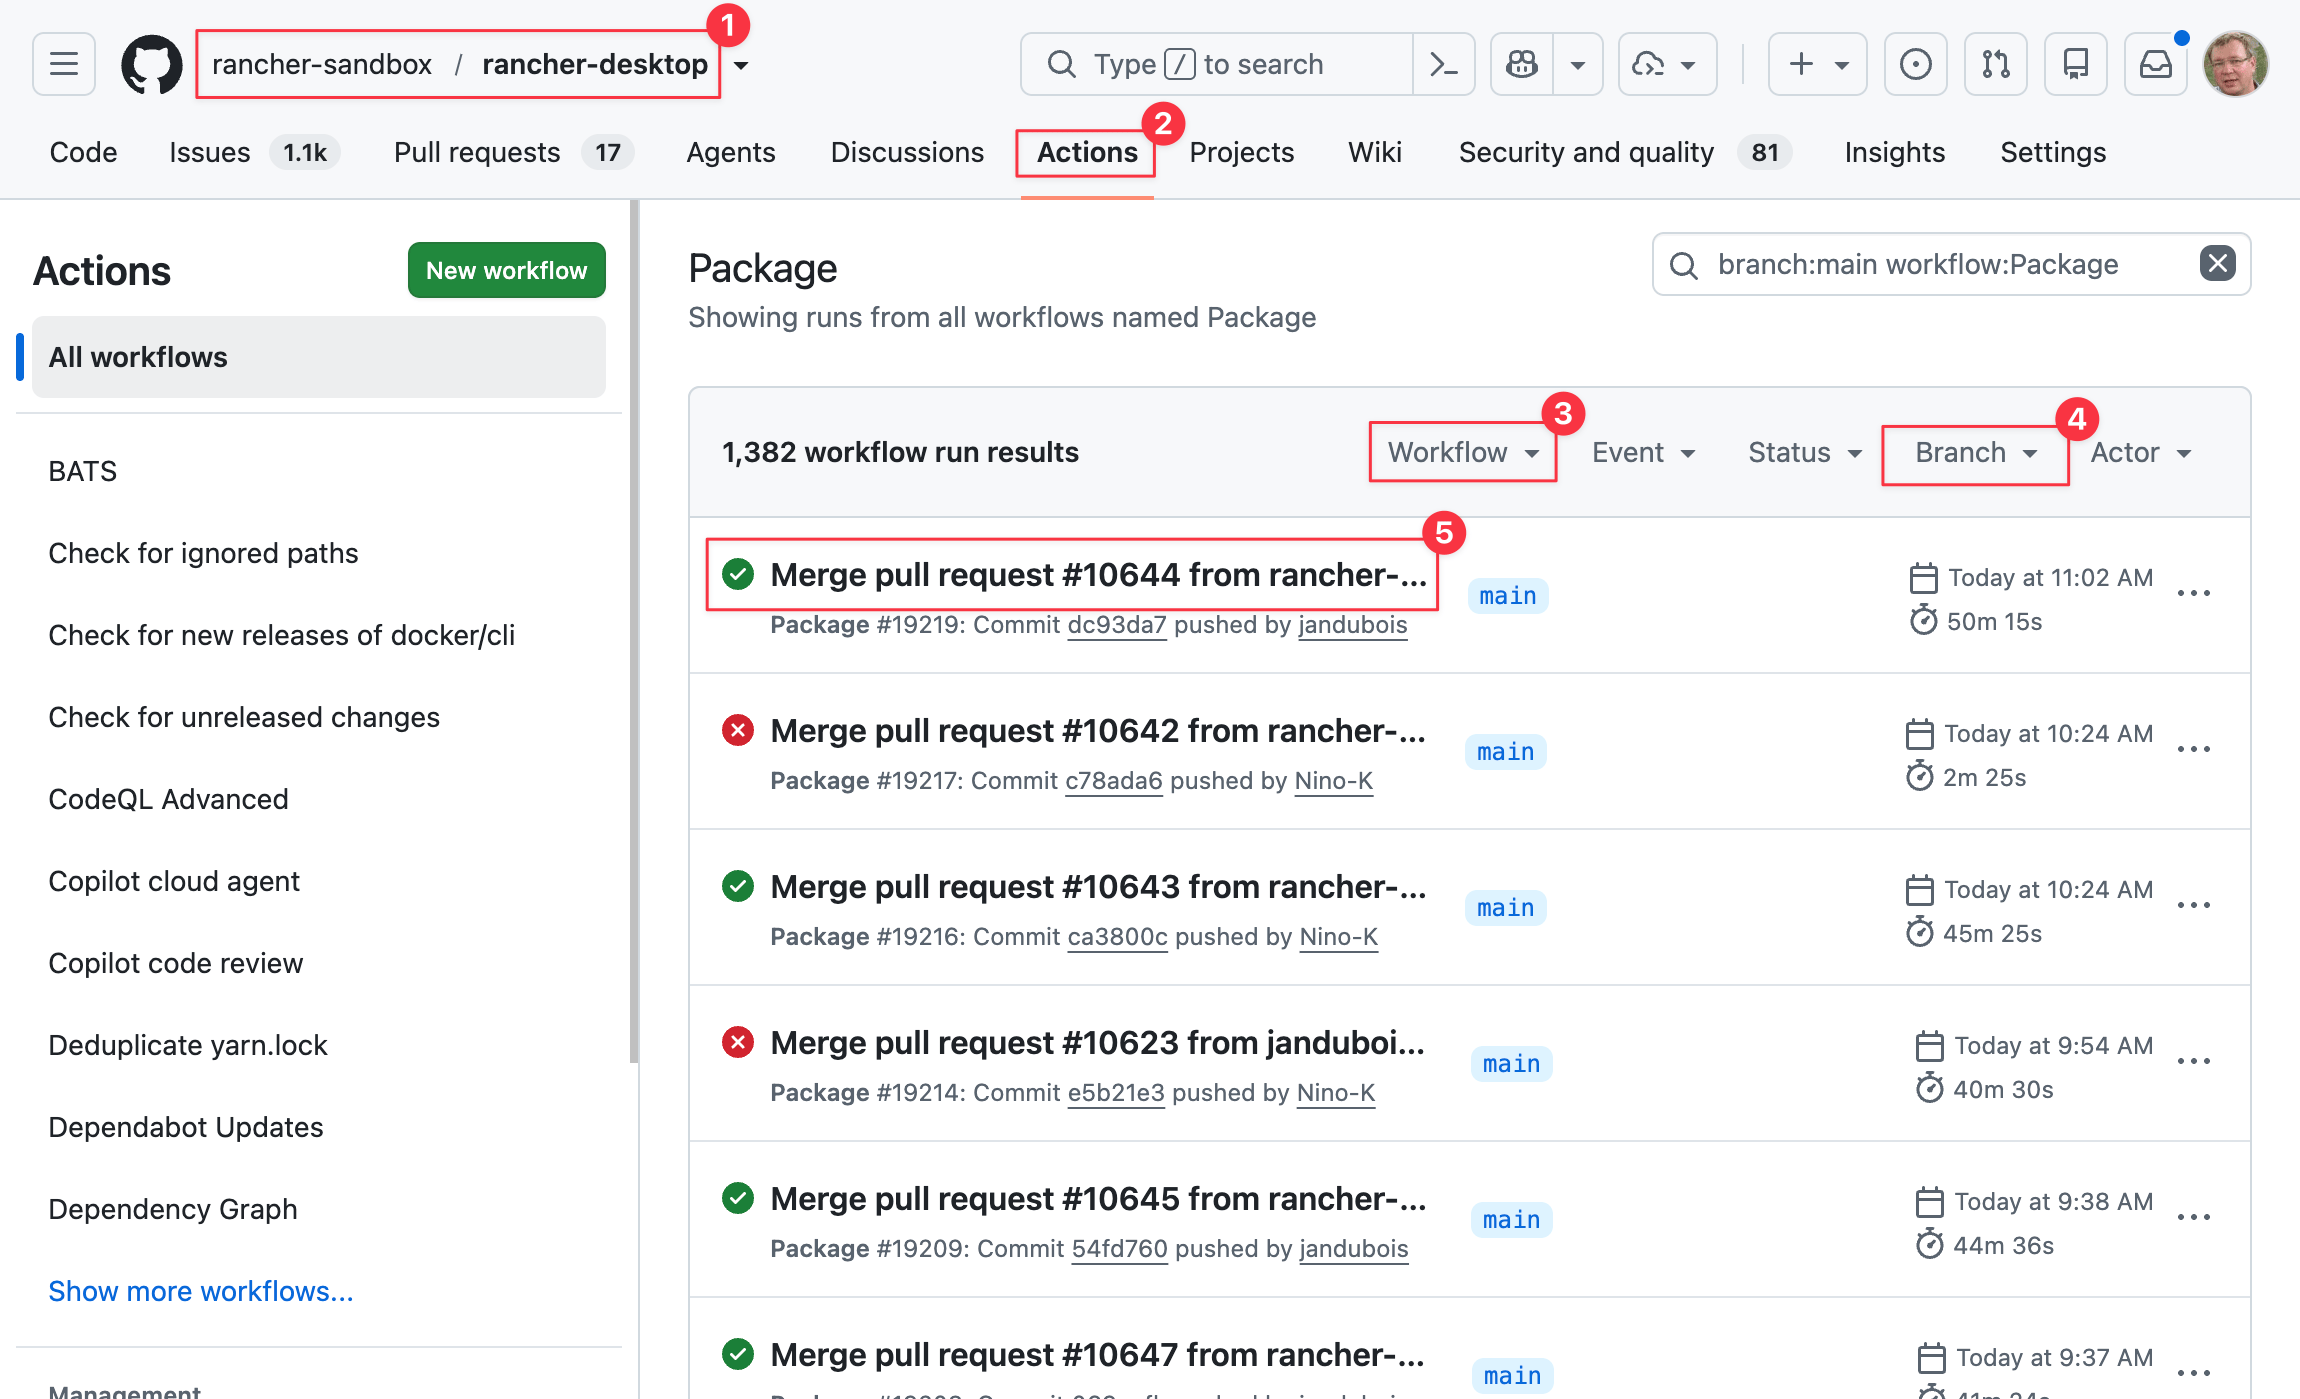
Development builds come from GitHub Actions4, from the workflow named Package.
For the latest main, open the Actions tab, then filter to the Package
workflow and the main branch. Or skip both dropdowns and type
branch:main workflow:Package into the search box. Now pick the newest run with
a green checkmark, which means the whole run passed and its builds are complete.
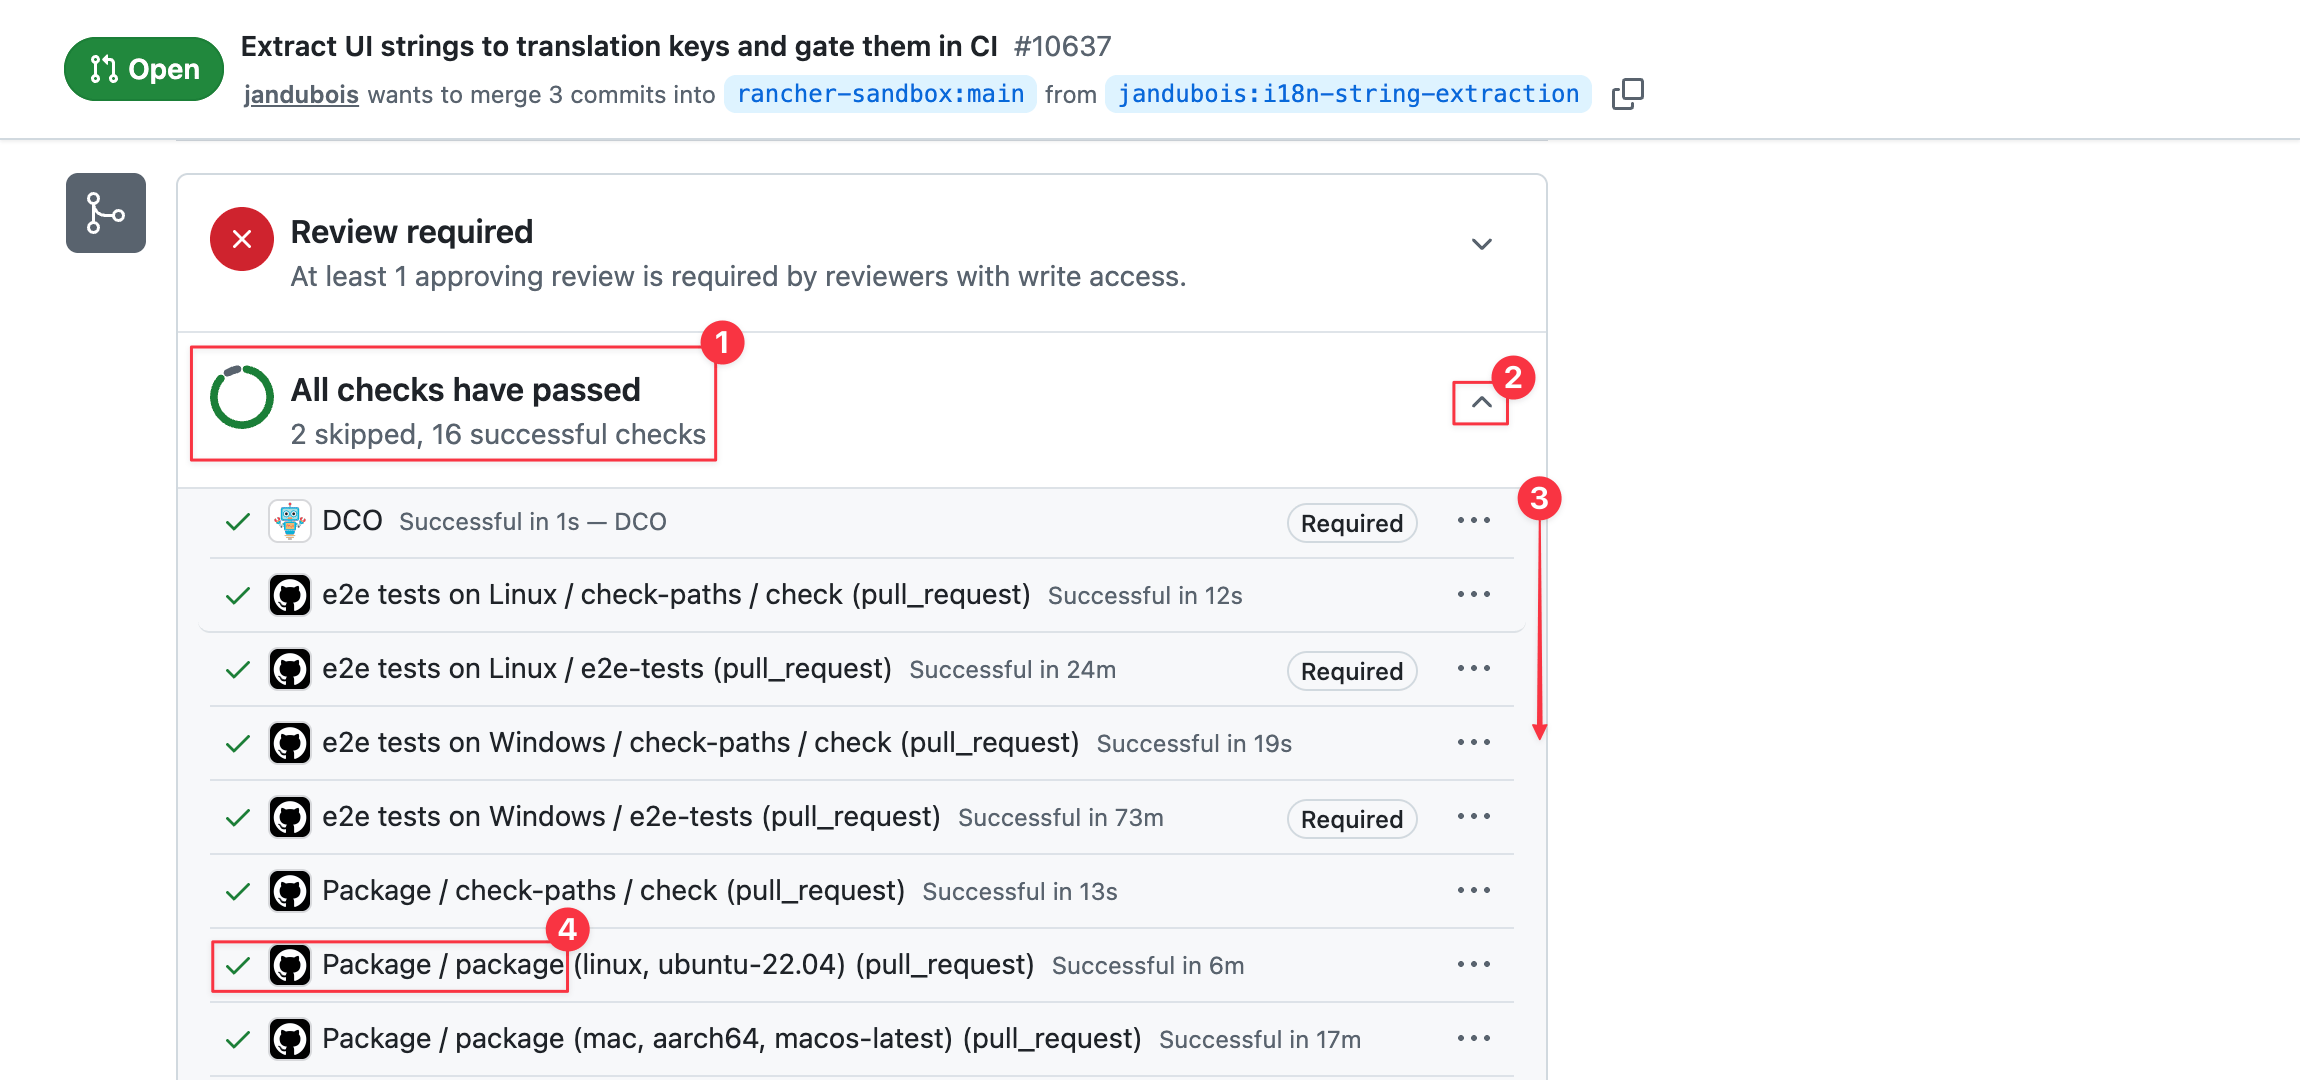
For a pull request, open the PR and scroll down to its checks. Expand them,
find a green check whose name starts with Package / package, and click it. The
platform in the parentheses doesn't matter. They all belong to the same run;
any of them gets you there.
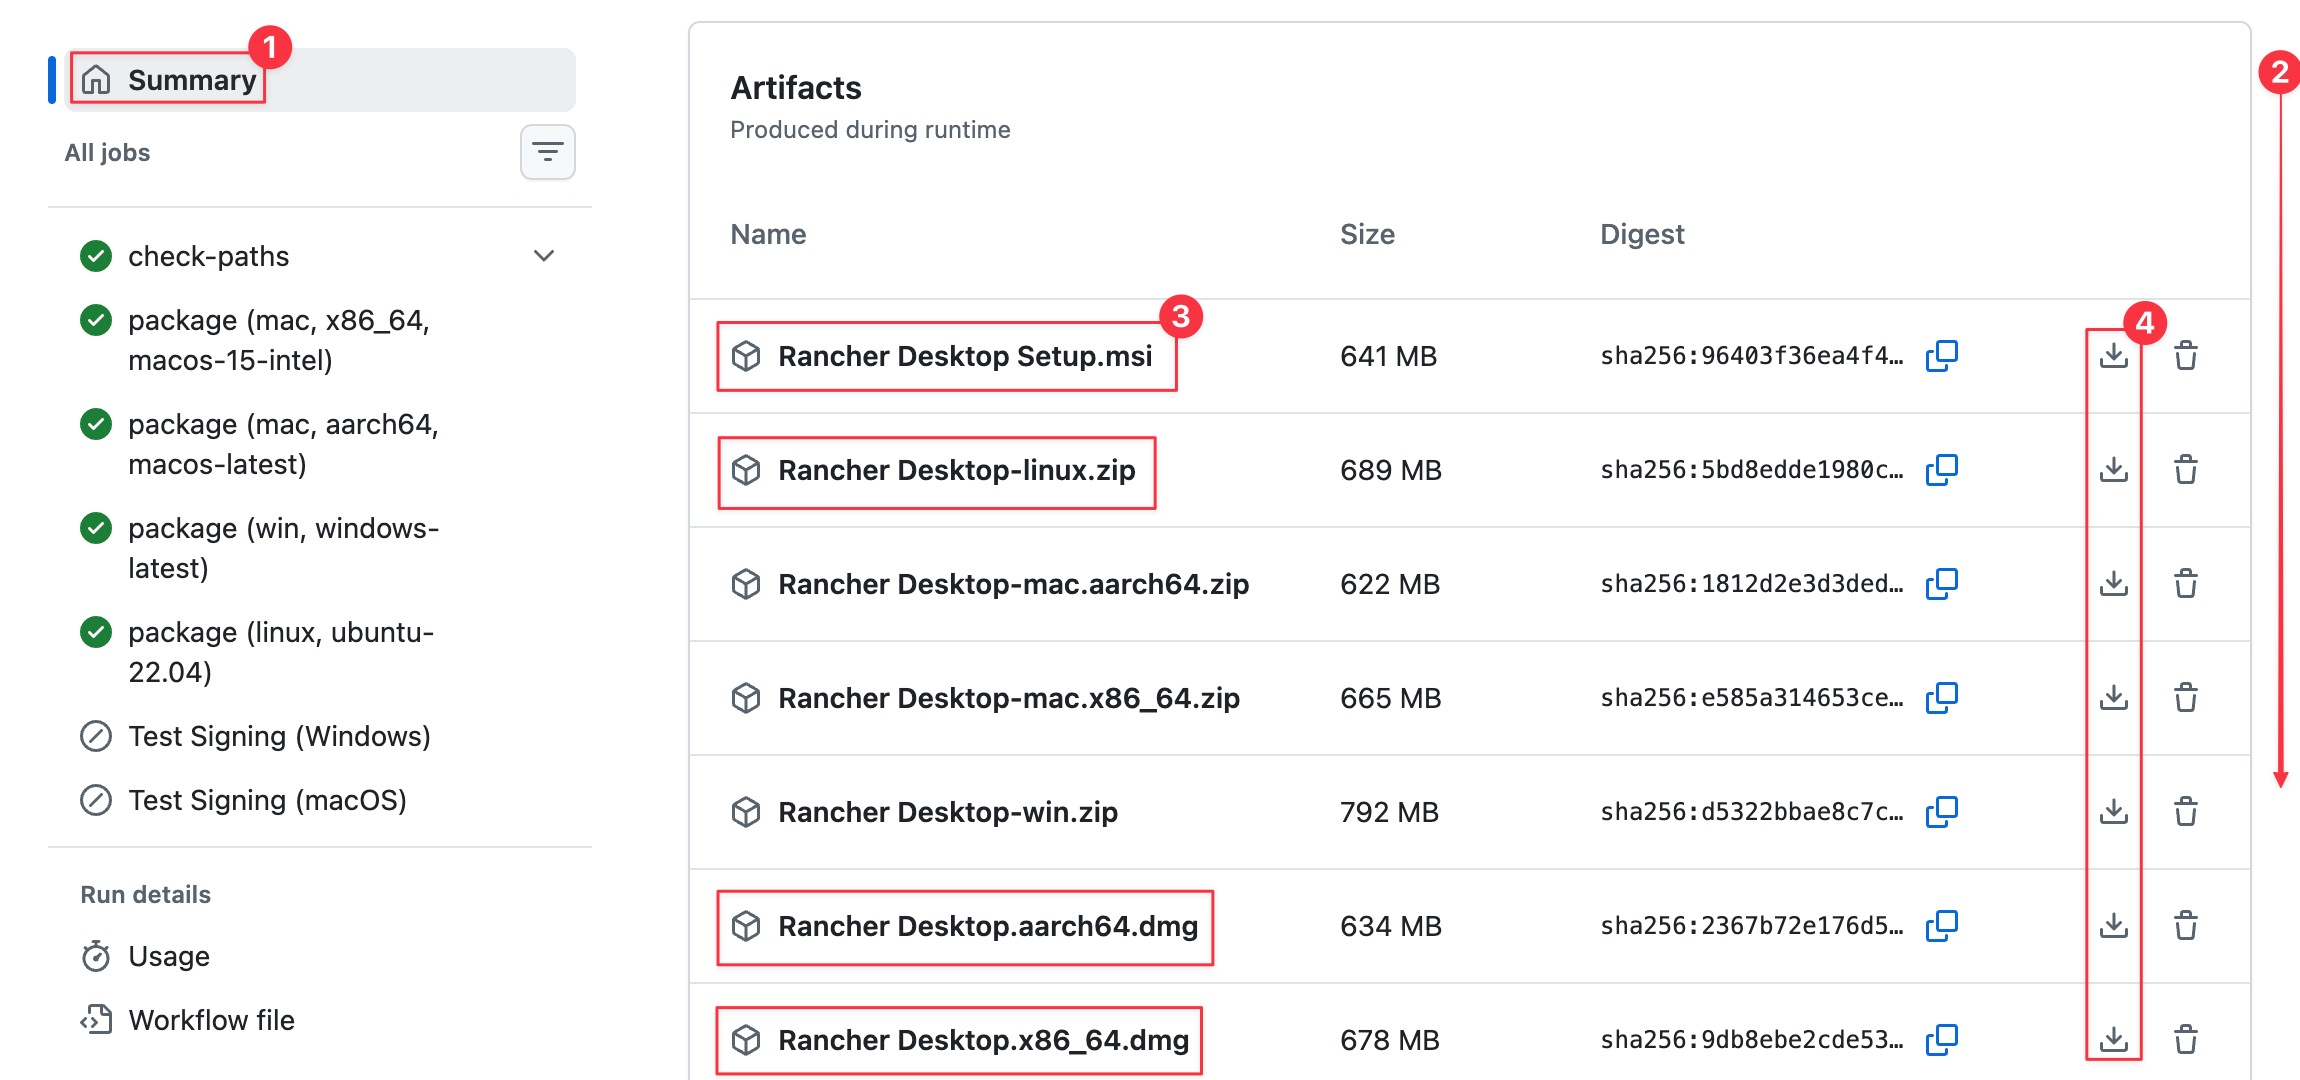
Either way, you land on a workflow run. Click Summary in the left sidebar, then scroll to the bottom, where GitHub lists the artifacts. Each artifact is one operating system and CPU architecture. Find the one for your machine and click the download icon beside it. They're large, 600 MB and up.
On 2.0, the same run also produces an RDD artifact for each platform, which
holds just the rdd binary with no app and no bundled tools. For testing a
backend fix you could use just this binary, as it's 50 to 60 MB (rather than
600 plus), but GUI changes would still require downloading the full app. The
binary still needs its quarantine flag cleared on macOS. The
installation post covers using rdd on its
own.
Unpack and install
What you downloaded is a ZIP, even on macOS and Windows, where a release hands
you a .dmg or an installer directly. GitHub wraps every build artifact in a ZIP
of its own. On every platform you unzip what you got first; the real artifact is
inside.
$ unzip "Rancher Desktop.aarch64.dmg.zip"
Archive:  Rancher Desktop.aarch64.dmg.zip
  inflating: Rancher Desktop-1.23.1-300-ge397ee701-arm64.dmg
The name changes on the way out5. That 1.23.1-300-ge397ee701 is
git describe output, which pins down which build you ran6. Don't go
hunting for that commit though. On a pull request GitHub builds a throwaway
merge of the branch into its base, so it only exists for that run. Link the run
itself when you report back.
On macOS, that inner artifact is a .dmg (pick the one matching your chip,
aarch64 for Apple silicon or x86_64 for Intel). Open it and drag the app into
Applications, the same as a release. Because the build is unsigned, macOS marks it
as quarantined and refuses to open it, so clear that flag once from a terminal.
The 1.x app is Rancher Desktop; the 2.0 app is Rancher Desktop 2. Use the
one you installed:
xattr -rd com.apple.quarantine "/Applications/Rancher Desktop.app"     # 1.x
xattr -rd com.apple.quarantine "/Applications/Rancher Desktop 2.app"   # 2.0
On Windows, the inner artifact is an .msi installer. Run it. Windows will
warn that it comes from an unknown publisher, again because the build is
unsigned; approve it to continue.
On Linux, the development build extracts to /opt/rancher-desktop, the same
place our RPM and DEB packages install to. So if you have Rancher Desktop from one
of those repositories, remove the package first; otherwise the two fight over
that directory. If you extracted a development build there before, clear it out with
sudo rm -rf /opt/rancher-desktop.
The download itself holds a second ZIP with the application. Unpack that inner ZIP into place, then make the sandbox helper setuid so the app can launch:
unzip "Rancher Desktop-linux.zip"   # yields rancher-desktop-<version>-linux.zip
sudo unzip -o rancher-desktop-*-linux.zip -d /opt/rancher-desktop
sudo chmod 04755 /opt/rancher-desktop/chrome-sandbox
A manual extract leaves no desktop entry behind. Launch it directly with
/opt/rancher-desktop/rancher-desktop7.
On Rancher Desktop 2.0, the app refuses to start on a backend that a different
rdd version created. You have to clear any existing one first (this removes
your current 2.0 workloads). The command is the same on every platform:
rdd svc delete
Then start Rancher Desktop the way you normally would; it runs like any release.
Going back to a release
Once you're finished with the development build, clear its backend so a release
can start clean. On Rancher Desktop 1.x that's rdctl factory-reset; on 2.0 it's
rdd svc delete.
rdctl factory-reset   # Rancher Desktop 1.x
rdd svc delete        # Rancher Desktop 2.0
Then install the release the normal way, from the project's releases page, or on Linux from our package repositories. On Rancher Desktop 1.x, restore the snapshot you took at the start, and your containers and cluster come back as they were. On 2.0 there's no snapshot to restore; you start fresh.
It's a lot of steps, though it does answer "is this actually fixed?" weeks ahead of the release.
💬 Questions or feedback? Discuss this post on GitHub →