Features
General
The General tab provides information on communication channels where users can connect with the Rancher Desktop team and community to ask questions, report bugs, or discuss Rancher Desktop in general.
Port Forwarding
To forward a port:
- Find the service and click Forward.
- Specify a port to use or use the randomly assigned port.
- Click the ✓ button to confirm your selection.
- Optional: click Cancel to remove the port assigned.
Images
The Images tab, allows you to manage the images on your virtual machine.
To manage your images using nerdctl instead, refer to the Images section.
Scanning Images
This feature uses Trivy to scan your images for vulnerabilities and configuration issues.
To scan an image:
- From the image list, find the image you want to scan.
- Click ⋮ > Scan.
- A summary of the vulnerabilities, sorted by the level of severity, are displayed.
- Click > to view the details of each vulnerability, including reference links to learn more about the particular vulnerability.
Adding Images
Pulling Images
Use this option to pull images from a registry to your virtual machine.
To pull an image:
- Click the + button in the top-right corner.
- Click on the Pull tab.
- Enter the name of the image to pull.
Note: By default, images are pulled from Docker Hub which uses the
repo/image[:tag]format. To pull from other registries, include the hostnameregistry.example.com/repo/image[:tag]. - Click Pull.
Building Images
Use this option to build an image and add it to your virtual machine.
To build an image:
- Click the + button in the top-right corner.
- Click on the Build tab.
- Enter a name for the image being built. E.g.,
repo/image,repo/image:tag,registry.example.com/repo/image, orregistry.example.com/repo/image:tag. - Click Build.
- In the file browser, select the Dockerfile to build an image with.
Troubleshooting
Show Logs
Use this option to open the folder containing all Rancher Desktop log files.
Enable Debug Mode
Enable debug level logging.
Reset Kubernetes
Reset Kubernetes and remove all workloads and configurations. Before the reset occurs, users are presented with a confirmation and the option to also delete container images.
To reset Kubernetes:
- Click Reset Kubernetes. A confirmation window appears.
- Optional: select whether to also delete container images.
- Click Reset to proceed. Kubernetes stops and starts again.
Factory Reset
Remove the cluster and all other Rancher Desktop settings. To continue The initial setup procedure must be done again.
To perform a factory reset:
- Click Reset. A confirmation window appears.
- Optional: select whether cached Kubernetes images are kept.
- Click Factory Reset to proceed. Kubernetes stops and Rancher Desktop closes.
- Optional: start Rancher Desktop again.
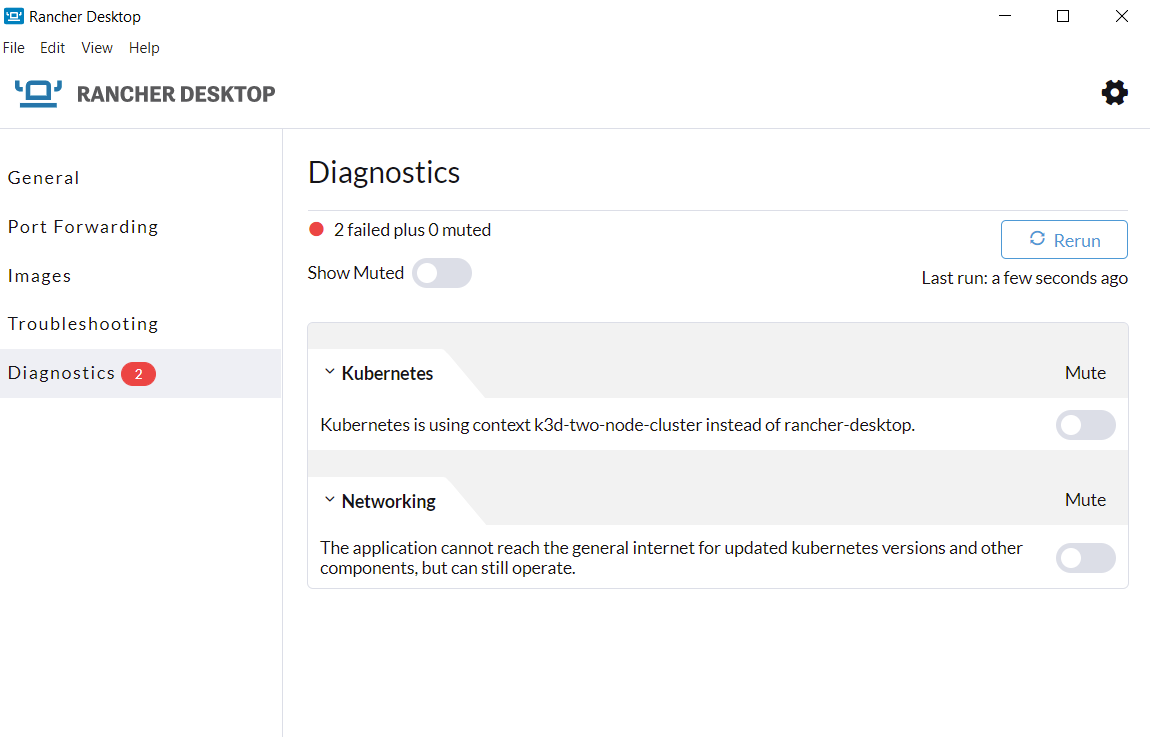
Diagnostics
Note: Rancher Desktop doesn't send the diagnostics data to any remote server for processing or storing.
The Diagnostics feature runs several checks in the background to detect common problems such as missing minimum requirements, misconfigurations, etc., in your environment to help you self-troubleshoot and fix Rancher Desktop application issues.
The diagnostics checks are run every time when the application launches. If there are any problems identified then the count of failed checks is shown next to the Diagnostics menu text in the left navigation bar, indicating that something needs your attention. The Diagnostics tab displays the results of the diagnostics tests, highlighting areas that need attention, and guides you to resolve problems.
On this tab you can mute/unmute individual checks if you have a non-standard setup and know that these checks don't apply to your situation. You can also rerun the diagnostics anytime to verify that changes you have made to your environment have rectified the problem.
Preferences
This page allows you to modify the settings of your Rancher Desktop instance.
- To access the Preferences, click on the ⚙ icon in the upper-right corner.
- Use the tabs on the left to access different categories of Rancher Desktop preferences.
- Update preferences as needed. The preferences available are outlined below.
- To apply the updates, click Apply.
Application
- Windows
- macOS & Linux
Automatic Updates
When an update is available, users are provided a notification and the release notes for the upgrade target. This happens whether automatic updates are enabled or not. If this option is enabled, the update is downloaded and then installed the next time Rancher Desktop is started.
Statistics
This option allows Rancher Desktop to collect information on how you interact with the Rancher Desktop application. Information such as what workloads you run are not collected.
Behavior
Administrative Access
Allows Rancher Desktop to acquire administrative access (sudo access) when starting for some operations. This allows for enhanced functionality, including bridged networking and default docker socket support. Changes will only be applied next time Rancher Desktop starts.
Automatic Updates
When an update is available, users are provided a notification and the release notes for the upgrade target. This happens whether automatic updates are enabled or not. If this option is enabled, the update is downloaded and then installed the next time Rancher Desktop is started.
Statistics
This option allows Rancher Desktop to collect information on how you interact with the Rancher Desktop application. Information such as what workloads you run are not collected.
Environment
Configure PATH
A Rancher Desktop installation comes with command-line utilities that are used to interface with its various features. Some examples of these utilities are docker, nerdctl, kubectl, and helm. These utilities are located in ~/.rd/bin - you may see which utilities are included in your installation by running ls ~/.rd/bin.
In order to use the utilities, ~/.rd/bin must be in the PATH variable in your shell.
There are two options for doing this:
- Automatic:
PATHmanagement will add~/.rd/binto yourPATHby modifying your shell .rc files for you. - Manual:
PATHmanagement does not change anything - in this mode, you must add~/.rd/binto yourPATHyourself.
WSL (Windows)
The option to make the Rancher Desktop Kubernetes configuration accessible to any Linux distributions configured for WSL. Once enabled, you can communicate with the Rancher Desktop Kubernetes cluster using tools like kubectl from within the WSL distribution.
With WSL, memory and CPU allocation is configured globally across all Linux distributions. Refer to the WSL documentation for instructions.
Virtual Machine (macOS & Linux)
Memory
The amount of memory to allocate to Rancher Desktop. The selectable range is based on your system. The red area within the range indicates an allocation that may affect system services.
CPUs
The number of CPUs to allocate to Rancher Desktop. The selectable range is based on your system. The red area within the range indicates an allocation that may affect system services.
Container Runtime
Set the container runtime for Rancher Desktop. Users have the option of containerd which provides namespaces for containers and the use of nerdctl or dockerd (moby) which enables the Docker API and the use of the Docker CLI. Only one container runtime will function at a time.
When switching to a different container runtime:
- Workloads and images that have been built or pulled using the existing container runtime are not available on the container runtime being switched to.
Kubernetes
Enable Kubernetes
This option allows you to enable or disable Kubernetes. By disabling Kubernetes, you can run just containerd or dockerd by itself for reduced resource consumption. By default, Kubernetes is enabled.
To enable/disable Kubernetes, just check/uncheck the Enable Kubernetes checkbox. The app will be restarted when you enable/disable Kubernetes. Disabling Kubernetes will not delete existing resources and they will be available again when you enable Kubernetes again.
Kubernetes Version
This option presents a list of Kubernetes versions that your Rancher Desktop instance can use.
When upgrading:
- A check is performed to see if the target Kubernetes version is available locally. If not, it downloads the files.
- Workloads are retained.
- Images are retained.
When downgrading:
- Workloads are removed.
- Images are retained.
To switch versions:
- Click the Kubernetes version drop-down menu.
- Select the version you want to change to.
Kubernetes Port
Set the port Kubernetes is exposed on. Use this setting to avoid port collisions if multiple instances of K3s are running.
Enable Traefik
This option allows you to enable or disable Traefik. By disabling Traefik, you can free up port 80 and 443 for alternate ingress configuration. By default, Traefik is enabled.
Disabling Traefik will not delete existing resources.